How To Clear Cache For Kodi On Mac
In case you're facing buffering-related issues, the first solution is to clear cache on your Kodi. So, here's how to clear cache on Kodi via Indigo.
| General topics | FAQs | Caches explained |
'Cache' can refer to one of many different types of caches that Kodi uses, and most are not directly related to each other.
A cache can refer to any data that is locally saved on the Kodi device and used for fast access to that data. The overall concept of a cache is explained on Wikipedia:Cache (computing).
Unlike other pages on the wiki that describe a specific feature or how to get something done, this page is dedicated to helping dispel some of the myths and mystery around the different types of caches that Kodi uses.
- 1Video cache - the source of most 'out of cache' messages
1 Video cache - the source of most 'out of cache' messages
The video cache is the most common cache that people talk about when it comes to Kodi. The video cache works by saving a few seconds of video before it is needed, so that if there are small slowdowns or bumps in loading the video, it will not constantly pause while waiting to get enough data to resume playing back. The video cache is normally stored in RAM and erased on the fly, as needed. It requires no user intervention to 'empty' this cache.
A warning about the cache filling up does not actually mean that more cache space is needed or that the existing cache needs to be emptied. The warning box is not currently well worded and has lead to a lot of confusion with users. What it means is that the video is loading too slowly for the cache to smooth out all of the bumps, and that the bumps will keep happening due to that low video speed.
Kodi only uses a tiny amount of RAM for the video cache, about 60 MB. This is because Kodi is not currently coded to see if the hardware you are using has more or less RAM, so to be safe only a small amount is assumed to be available. Users are able to increase this amount, and modify how 'quickly' it fills up, by following the guide at HOW-TO:Modify the video cache. However, changes to these settings are only helpful for a few situations, such as a network that fluctuates in speed, occasional wifi interference, or a connection that is borderline too slow for video to playback.
Note: No amount of video cache tweaking will make a slow server connection any faster, which is a common issue for people who stream over the internet. Even if you have a fast connection on your device, it doesn't matter if the connection on the other end is slow. The server itself might not always be slow, but might be more busy at different times of the day.
1.1 'Zero' cache
A lot of people see references to a 'zero cache'. This is a specific setting for the video cache to use local storage (such as a hard drive) instead of RAM. This setting is not needed for most users, even if you only have 1GB of RAM total.
Note:The zero cache mode/settings does not improve video buffering or performance.
| Users should not use the zero cache mode/settings on a device that does not have a lot of free internal space, such as an Amazon Fire TV, OUYA, or other devices with only about 8GB of local space total. Such devices will only have about 4GB of available space when you deduct the OS and other files that are used, and this is rarely enough space for a full length movie. If Kodi attempts to use the local drive without having enough space then video will either suddenly stop, or Kodi could even crash. |
Like all video cache settings and modes, the user does not need to manually 'empty' the cache when using the 'zero' setting. Kodi will automatically empty such temporary files.
2 Add-on cache - the common source of running out of local drive space
Some (but not all) add-ons will save files to make their own 'cache'. This can be for many reasons and be used for many different types of files. Some add-ons will even bypass the normal video cache (described in the section above) and implement their own special video cache, by pre-downloading files and then playing them back locally. This method isn't necessarily wrong, but it depends on the add-on keeping track of those downloaded files and cleaning them up, or else the device will run out of available drive space.
Many add-ons do not always clean up these files, and as a result some people have used various tools to 'clean the cache'. Because the only known add-ons that have these issues are ones that break the community rules for the official Kodi websites, we cannot help users who need help with this situation. The only advice that can really be given here is that you should avoid using add-ons that are unable to clean up after themselves. If you do need to clean up such files, there is information on the internet for doing so.
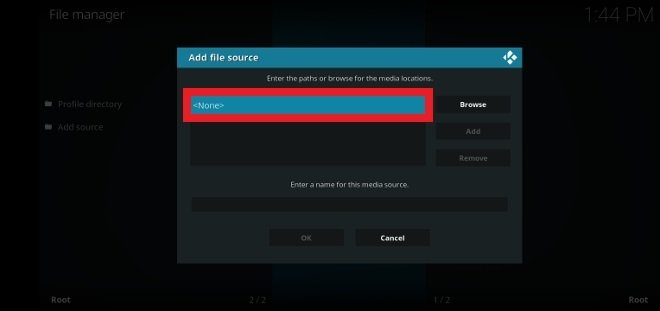
For any situation where you need to clean up leftover add-on data files, you can also manually delete various add-on files by going into the File manager and navigating to the userdata folder (which will be labeled as Profile directory) and then into the addon data folder. Find the add-on in question, and you should be able to manually delete files inside that have collected over time. Be careful to not delete anything important, such as a settings file for an add-on you still wish to use. The exact contents of these folders vary greatly between add-ons.
3 Android application cache
On Android devices there is an 'application cache' for nearly all Android apps. This can be accessed by going into your Android settings and then into Apps, and then selecting the specific application in question.
For Kodi the application cache only contains various default files, and normally does not need to ever be cleared. However, it is possible for one of these files to sometimes be corrupt, or sometimes Kodi crashes before it is able to delete older files, and the user must use the button/option to clear the Kodi application cache. If you have any issues with Kodi starting on an Android device then this is one option that can be tried to fix it. This should not clear out any Kodi user settings, add-ons, or library information, but you should still avoid clearing this cache very often. The next time that Kodi is ran you will see a 'first run' screen, where it regenerates these files.
4 Image cache
Kodi will cache various images, mainly those used in the video library, automatically and without need for user intervention. If a user is ever low on local disk space, such as having a large video library, or having an install that has been active for a long time, then sometimes manual cleaning is needed. For more information about such cleaning, see HOW-TO:Reduce disk space usage. That page also describes how to save such images in another location, such as an external drive or on a network share, for devices with low internal memory.
5 Temp and other files
Aircaster playout software crack. There are a few other files, mainly temporary files that are automatically cleaned up, that Kodi might save. This includes things like some subtitle related files, extracted videos from a zip or rar archive, previous versions of some add-ons, or other data that is saved to be quickly accessed if necessary.
Editor note: This is sort of a 'catch all'/ 'other' section, in addition to files actually contained in the temp directory. There's not a whole lot to be said about such files that I can think of, but feel free to expand on this section if you wish or think of anything interesting.
Cache is basically a technical data that is stored when an app, browser or system performs a task. Cache files serve a vital function as they contain a “shortcut” to a task in order to perform it faster the next time.
Why should you clear cache on Mac?
Old cache files that remain latent in the system do nothing but piling up, cluttering your system folders. What was initially useful becomes a drag, slowing down your Mac through all the wasted space it is taking up.To make it even worse, undeleted cache data also leads to task conflicts and other system issues.
Here are the three main categories of cache data:
- Browser cache
- System cache
- App (or User) cache
How to clear cache on Mac
Now, if you’re ready to finally get down to business, we’re going to walk you through both the manual and the automatic solutions to clear your cache.
Cleaning app cache and system cache on Mac
It’s staggering how much space can in fact be occupied by app/user cache on Mac. Wondering how much storage you’ve lost already? Well, it’s different for everyone, but it’s safe to assume several gigabytes at the very least. System caches doesn’t waste that much, yet they are still “heavy” enough. Luckily, you can clear the both types in the same fashion.
Below we will show where exactly these cache files are lurking around your Mac. But please be careful — if you accidentally delete the wrong file, you may run into trouble.
To play it safe, backup the folders mentioned in the steps below. If everything works as it should, you can later delete these backups. Or you can skip the manual steps and go straight to Quick Tip (the safe and easy option).
How to delete system cache and unwanted app data manually
To delete system and app cache manually, follow these steps:
- Open Finder and select Go > Go to Folder
- Type in ~/Library/Caches and hit Enter
- Backup the folders if you are worried about something going wrong
- Keep the folders, but go into each one and delete the files inside
Sorry to tell you, but we’re not finished yet. There are a few more folders and to remove them completely just follow the same steps, but this time go to /Library/Caches (without the ~). When you’re done, just empty the Trash to finish the job.
Quick Tip: get rid of system/app caches in one click
Clearing app caches manually is a tough nut to crack. To do the job in a fraction of the time (and without the risk of losing something important), you can fire up a dedicated cache cleaner app, CleanMyMac X . It will find and clear all your app caches blazing fast.
See how easy it is with these steps:
- Download CleanMyMac X (it’s free to download)
- Run the app and click on System Junk
- Click on the big Scan button
- When it’s done scanning, click Clean
How to clear Internet cache on Mac
Clearing browser cache has two good things about it: it frees up space for your Mac to run faster and it removes your browsing history, making sure nobody ever finds your digital trail. Since each browser deals with caches differently, we’ve broken the cache-clearing solutions to three main browsers – Chrome, Safari, and Firefox.
If you’re uncomfortable deleting cache manually, and prefer a less time-consuming approach, you can skip down to “How to clear all browser cache easily” to remove all your browser caches in one go.
Moving the target symbol changes the rotation point. This symbol represents the center of the transformation, which is why, by default, it's in the center. It's also why my pattern rotated around its center, since it was actually rotating around that target symbol. We can change the rotation point simply by clicking on the target symbol and dragging it somewhere else. Photoshop cs6 keyboard shortcuts for mac. For example, if I want my pattern to rotate around its bottom right corner, all I need to do is drag the target symbol into that corner (it will snap into place when it gets close enough to the corner).
How to empty cache in Safari
In Safari, clearing cache is as easy as it gets. Just go to History and click Clear History in the menu bar. Your cache and website history will be cleared immediately. If you prefer knowing exactly what you’re clearing, you can do that with a few more steps.
To empty cache on Safari with manual methods:
- Go to Safari > Preferences
- Select the Advanced tab
- Enable Show Develop menu
- Go to the Develop section in menu bar
- Click on Empty Caches
How to clear browser cache in Chrome
When it comes to Chrome, clearing cache on Mac requires the following steps:
- Click the Google Chrome settings icon in the top right browser window
- Choose Settings
- Choose History and click Clear browsing data
- Make sure Cached images and files are checked
- Choose the Beginning of Time to clear all your cache
- Click Clear browsing data button to finish

How to delete cache in Firefox
And here’s for Firefox users (it’s even simpler than with the previous two). Just proceed with the following:
- Navigate to History > Clear Recent History
- Select Everything from the time range menu
- Click the arrow next to Details and make sure only Cache is checked
- Click Clear Now
How to clear all browser cache easily
So you decided to ditch the manual way and skipped to the automatic method. Congratulations! This is the quickest and safest way to remove browser cache. Instead of doing it manually through your browser settings, you can gain full control over all your cache and history data with CleanMyMac X . It’s an easy cache cleaner that will do the job like a charm. Follow these steps to clear all your browser caches:
- Run CleanMyMac and go to the Privacy module
- See all your browsers listed, select any of them
- Tick items you want to clean
- Finally click Remove to clear your browser
A final reason to clear cache on Mac
Cache data works wonders for your Mac and system, but over time it can pile up and slow down your Mac’s performance, taking up the increasing amounts of space.
Hopefully, our guide will be everything you needed and more to free up gigabytes of valuable space and reclaim it by cleaning cache.
Best of all, we’ve also revealed how an automatic cache cleaner like CleanMyMac X makes removing cache as easy as a child’s play. Download the free version of the app here.
Let us know how it goes!